Recommended Tooling
Core language features, like ownership and modules, color the Rust development experience regardless of project size and scope. The growing library ecosystem makes many ambitious projects feasible - we can leverage abstractions developed and maintained by others. Built-in test support helps us build those bold projects with confidence.
There's a final, perhaps less glamorous, aspect of software engineering we need to cover: maintenance. While smart use of modules can help us tame architectural complexity, even a well-organized project needs additional tools to maintain the health of its codebase.
In this section, we'll briefly cover the basics of Rust's 1st-party documentation, linting, code formatting, and build reproduction tools. We'll also sample 3rd party utilities for miscellaneous tasks, like auditing dependencies for known vulnerabilities.
1st Party Tooling
rustdoc
Rust has a built-in document generator, rustdoc1.
It's a default part of the toolchain and comes bundled along with cargo.
A special comment syntax allows you to write documentation, in Markdown2, directly alongside code.
The benefit is twofold:
-
A documentation website can be rendered locally or served remotely. It's as comprehensive as your set of comments. That's a huge boon to library users.
-
Your documentation examples are automatically run as unit tests. This ensures that, any given time, the documentation is current - at least with respect to your provided examples. And it gains us a bit of momentum on building out a test suite.
To see rustdoc in action, let's create a new library:
cargo new --lib prime_test
Running tree prime_test shows the following project layout.
prime_test/
├── Cargo.toml
└── src
    └── lib.rs
Add the following to lib.rs:
//! This library does unoptimized primality testing.

/// Given a list of numbers, get the count of prime numbers present.
///
/// # Example
///
/// ```
/// use prime_test::count_primes;
///
/// let list = [1, 2, 3, 4, 5, 6, 7, 8, 9, 10];
/// assert_eq!(count_primes(&list), 4);
/// ```
#[doc(alias = "primality")]
pub fn count_primes(num_list: &[usize]) -> usize {
    // Unnecessary, unidiomatic check
    if num_list == [] {
        return 0;
    }

    num_list.iter().filter(|n| is_prime(**n)).count()
}

// Prime number check.
// This is a naive implementation,
// there are much more efficient implementations.
// Returns `true` if `n` is prime, `false` if not.
fn is_prime(n: usize) -> bool {
    if n <= 1 {
        return false;
    }

    for i in 2..n {
        if n % i == 0 {
            return false;
        }
    }

    true
}-
The very first comment, prefixed with
//!, provides documentation for the crate as a whole. -
The
count_primesfunction, markedpub, is exported from the crate root (lib.rs). It's part of the public API.-
The comments starting with three forward slashes (
///) will be part of the rendered documentation. -
#[doc(alias = "primality")]is a macro that tags the function with another keyword, so that users entering the relevant search termprimalitywill see this function displayed in search results.
-
-
is_primeis a private helper, it doesn't have thepubmodifier for export and uses regular, non-document comments (lines starting with//).
Running cargo test will execute both unit tests we've written and all documentation examples.
To run the doc tests alone, we can use cargo test --doc:
running 1 test
test src/lib.rs - count_primes (line 9) ... ok

test result: ok. 1 passed; 0 failed; 0 ignored; 0 measured; 0 filtered out; finished in 0.16s
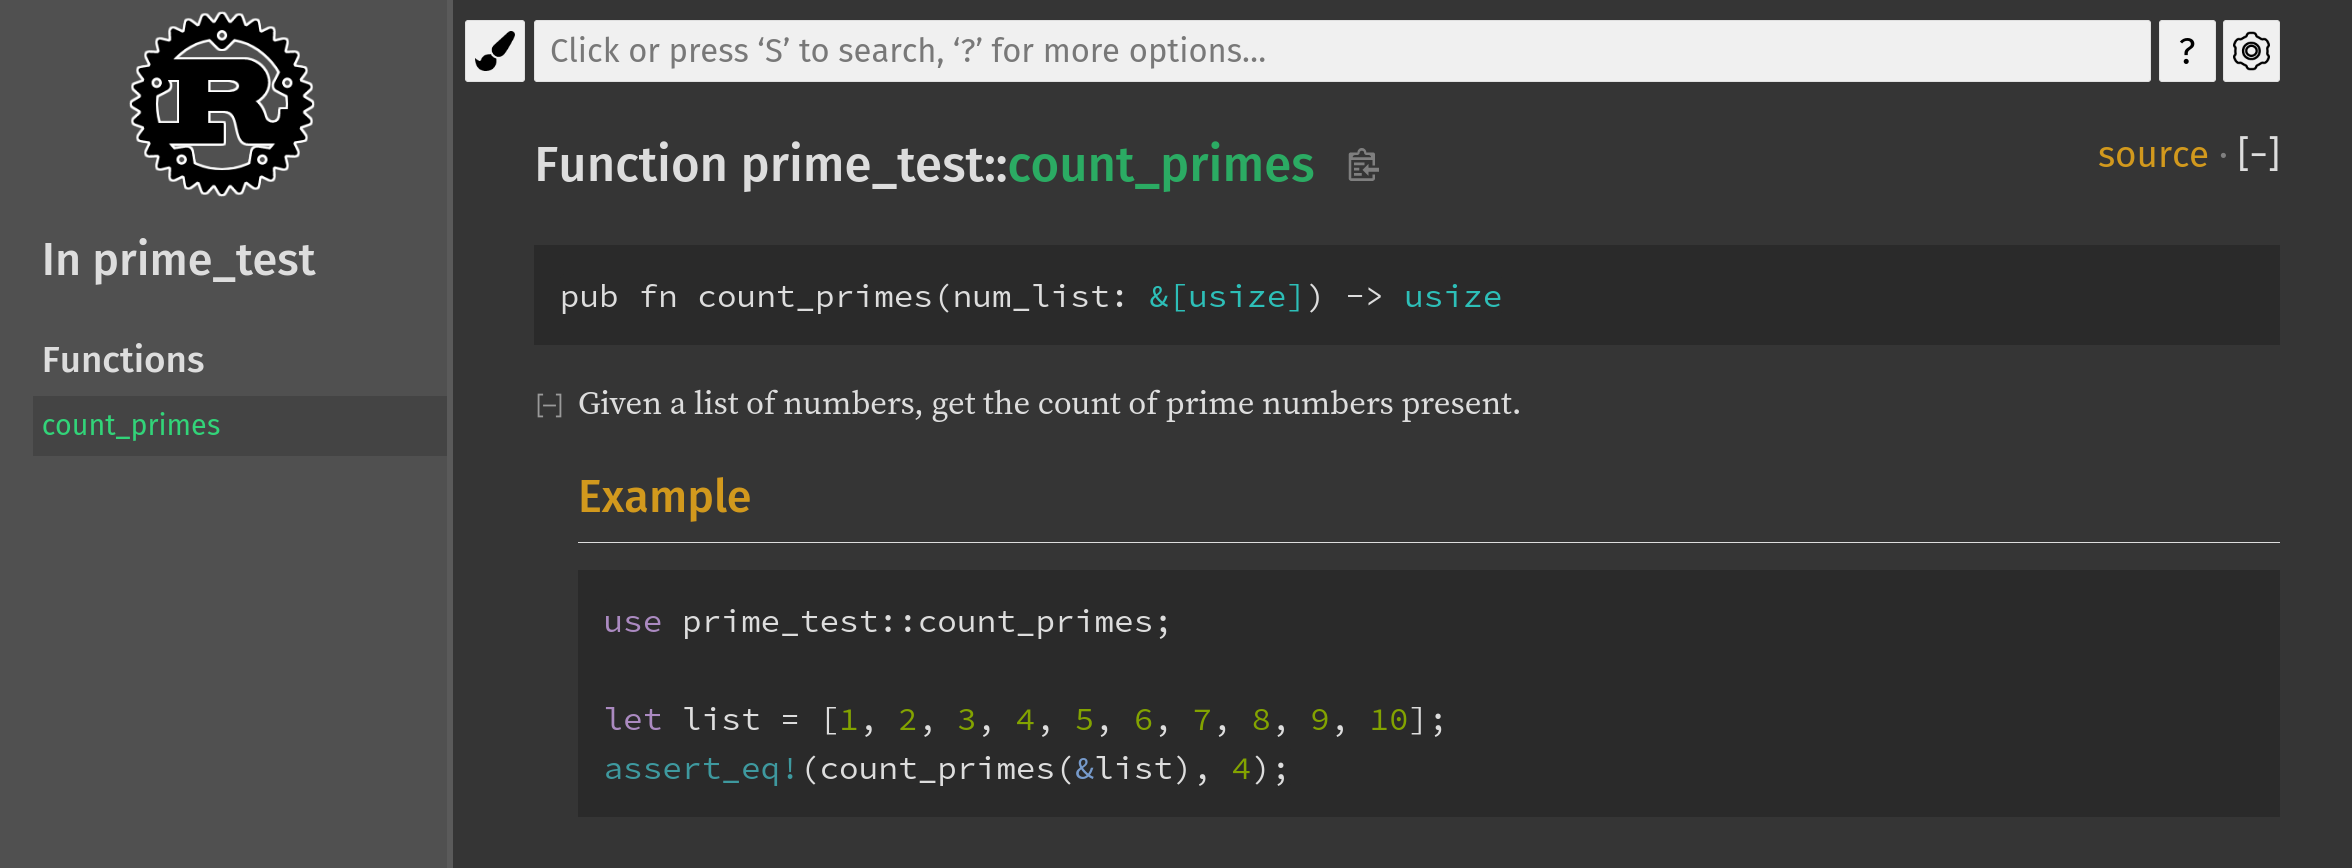
To render the documentation locally, run cargo doc --open.
The generated HTML/CSS/JavaScript webpage will be opened with the system's default browser.
A landing page shows crate-wide documentation and enumerates exported modules, structures, functions.
In our case, the only public item is the count_primes function.
Clicking on it leads to a documentation page showing our example:
Because rustdoc is used for standard library documentation, its format is already familiar to Rust developers.
Moreover, if you publish projects to crates.io, Rust's official package repository, documentation for your project is automatically rendered and hosted at docs.rs, Rust's official documentation host.
The onus of writing clear and complete documentation is still on you, but the tooling and infrastructure eliminate barriers to getting docs into the hands of the users that need them.
Some additional tips:
-
Should you want to enforce completeness across every exported item: adding the optional
#![deny(missing_docs)]within the crate root makes missing documentation a compile-time error. -
If your code examples include boilerplate the user can assume is present, you can omit it from the rendered doc but still have it present during test execution by prefixing the line with
#.- For instance, had our example for the
count_primesfunction started with# use prime_test::count_primes;, the documentation wouldn't show this import line.
- For instance, had our example for the
-
Not every documentation example may be full standalone, runnable code. To have
cargocheck that an example compiles but not actually attempt to execute it as doc test, the code block be prefixed withno_run- added immediately after the three opening backticks. For code that shouldn't be compiled or run,ignorecan similarly be used.
clippy
clippy is an official code linting tool.
It's already installed in the book's container, but the typical setup would be:
rustup update
rustup component add clippy
Per the README.md of clippy's official source repo3, the tool supports over 500 lints across the following categories:
| Category | Description | Default level |
|---|---|---|
clippy::all | All lints that are on by default (correctness, suspicious, style, complexity, perf) | warn/deny |
clippy::correctness | Code that is outright wrong or useless | deny |
clippy::suspicious | Code that is most likely wrong or useless | warn |
clippy::style | Code that should be written in a more idiomatic way | warn |
clippy::complexity | Code that does something simple but in a complex way | warn |
clippy::perf | Code that can be written to run faster | warn |
clippy::pedantic | Lints which are rather strict or have occasional false positives | allow |
clippy::nursery | New lints that are still under development | allow |
clippy::cargo | Lints for the cargo manifest | allow |
The full lint set has a searchable documentation site4.
Notice that clippy::correctness can find actual bugs (as opposed to, say, unidiomatic but correct code pointed out by clippy::style).
However, only a small minority of correctness checks are precise enough to be applied confidently and automatically (e.g. MachineApplicable5 rules).
To run clippy on the prime_test library with default settings:
cd code_snippets/chp3/prime_test
cargo clippy
We'll get the following warning for the if block inside count_primes commented with // Unnecessary, unidiomatic check:
warning: comparison to empty slice
  --> src/lib.rs:18:8
   |
18 |     if num_list == [] {
   |        ^^^^^^^^^^^^^^ help: using `is_empty` is clearer and more explicit: `num_list.is_empty()`
   |
   = note: `#[warn(clippy::comparison_to_empty)]` on by default
   = help: for further information visit https://rust-lang.github.io/rust-clippy/master/index.html#comparison_to_empty

warning: `prime_test` (lib) generated 1 warning
This warning is indeed helpful, using the more explicit is_empty() API makes our code easier to understand at a glance.
The warning will disappear if we update count_primes to:
pub fn count_primes(num_list: &[usize]) -> usize {
    if num_list.is_empty() {
        return 0;
    }

    num_list.iter().filter(|n| is_prime(**n)).count()
}
But linters have a limitation. They parse syntax, they don't understand semantics. Even though the more complex lints can make it appear that way.
In reality, we don't need the check because filtering an iterator (.iter().filter(...) in the above) already handles the empty-input edge case correctly.
This function could be a one-liner:
pub fn count_primes(num_list: &[usize]) -> usize {
    num_list.iter().filter(|n| is_prime(**n)).count()
}
Nonetheless, clippy is a powerful and useful tool for improving and maintaining general code quality.
And its lints regularly improve.
clippy makes a great addition to CI.
Aside on "Trojan Source" Attacks
One of the more esoteric lints in the
clippy::correctnessdenies invisible Unicode characters in source files. While that eliminates potentially surprising edge cases, the Rust compiler itself now does linting to prevent "trojan source" attacks6 - which use encoding tricks to produce source code that reads one way to a human (in terms of visible characters) but appears another way to the compiler (in terms of parsed tokens). This change was made in response to CVE-2021-425747, in which researchers reported the attack as a threat to supply-chain security.
rustfmt
Unlike a linter, which checks for best practices and high-level idioms, rustfmt enforces low-level style rules.
Things like maximum line width, the number of allowed blank spaces between items, whether opening braces should be on the same line or the next, etc.
The individual rewrites applied for a given project are configurable8. You can adjust style rules to suit your team's preferences.
Like rustdoc, rustfmt can be run with a cargo subcommand.
To apply the default ruleset:
cargo fmt
In the case of our prime_test library example, the command would have no effect.
But for large, multi-developer codebases it can be an important way to ensure a baseline level of consistency and readability.
Like clippy, rustfmt is an ideal candidate for CI.
Code review can be more efficient when all commits conform to a uniform style.
The Cargo.lock File
This last entry in the 1st party list isn't a standalone tool - rather an important feature of cargo we should discuss.
After running cargo build or cargo run, you may have noticed a new file appear alongside Cargo.toml: Cargo.lock.
Where as Cargo.toml is something you'll edit frequently (e.g. to add new dependencies), Cargo.lock is an auto-generated file containing metadata for reproducible builds9.
It "locks in" a specific dependency version at build time.
You wouldn't want cargo to eagerly upgrade dependencies every time you build.
Reproducible Builds
For example, say you added a dependency on the rayon crate10 to your Cargo.toml like so:
[dependencies]
rayon = "^1.5"
Per the Cargo Book's guide to specifying dependencies11, this means the project can use any semantic version12 of rayon that is greater than 1.5.0 but less than 2.0.0.
Let's assume at the time you first built your project, the latest available version of rayon was 1.5.0.
What happens when version 1.5.1 comes out?
Nothing.
The Cargo.lock file generated during that first build logged 1.5.0 as the version of rayon to use.
If you share a copy of the project directory with a co-worker, including the Cargo.lock, they'll be able to build the project using the exact same dependency versions as you.
Committing the Cargo.lock file to version control is a good idea for projects that build an executable, like Chapter 2's CLI tool.
So anyone can build an equivalent executable.
Additionally, you may choose to include rust-toolchain.toml13 file to ensure your co-worker uses the exact same compiler version and targets the same platform.
In theory, locking dependency versions shouldn't be necessary.
Semantic versioning dictates that 1.5.1 only contains fully-backward compatible bug fixes.
But that's a convention that can't be automatically enforced.
And software is complex, it's entirely possible for some minor bug fix to create a problem specific to your product or environment.
That's why reproducible builds are so important for production software.
Especially when it comes to Continuous Integration and Continuous Deployment (CI/CD).
When you are ready to update the latest dependency versions allowable by your Cargo.toml, simply run:
cargo update
cargo test
The former command searches for new published versions and updates your Cargo.lock.
The latter runs your test suite.
Just in case.
Self-hosted Dependencies
Note that your dependencies do not need to be hosted on crates.io.
Chapter 2's CLI tool could have pulled clap directly from it's GitHub repository like so:
[dependencies]
clap = { git = "https://github.com/clap-rs/clap.git", features = ["derive"] }
git = ... can be used for any Git repository URL, including private, self-hosted repositories maintained by your company or team.
Moreover, you can lock to a specific branch and commit hash manually:
[dependencies]
clap = { git = "https://github.com/clap-rs/clap.git", branch = "master", rev = "31bd0b5", features = ["derive"] }
This is useful if you need to stay on a known-good version of an internal library, while still using cargo update to keep other dependencies tracking with upstream.
3rd Party Tooling
Built-in maintenance tools are the tip of the iceberg.
The ecosystem offers an array of additional capabilities, often bundled as plugins to cargo.
This means extending cargo with additional subcommands is as often easy as running cargo install <name_of_tool>.
Although some tools have additional setup steps.
We'll sample three different 3rd party plugins. For the remainder of this section, we'll assume you're using the book's container - which has each pre-installed. If not, please refer to the documentation of each individual tool (linked to in the footnotes).
cargo-modules
When you need a quick overview of a large Rust project, cargo-modules14 can be handy.
It prints the modules hierarchy, including both internal and external APIs, to console.
Let's try it out on clap, the CLI argument parser we used in Chapter 2:
git clone git@github.com:clap-rs/clap.git
cd clap/
cargo modules generate tree --with-types --package clap
You should see a color-coded printout starting with something akin to:
crate clap
├── const INTERNAL_ERROR_MSG: pub(crate)
├── const INVALID_UTF8: pub(crate)
├── struct SubCommand: pub
├── mod build: pub(crate)
│   ├── mod app_settings: pub(self)
│   │   ├── struct AppFlags: pub
│   │   ├── enum AppSettings: pub
│   │   └── struct Flags: pub(self)
│   ├── mod arg: pub(self)
│   │   ├── struct Arg: pub
│   │   ├── enum ArgProvider: pub(crate)
│   │   ├── enum DisplayOrder: pub(crate)
│   │   ├── type Validator: pub(self)
│   │   ├── type ValidatorOs: pub(self)
│   │   └── fn display_arg_val: pub(crate)
...
cargo-audit
Rust's crate ecosystem is something of a "double-edged sword":
-
On one hand,
cargomakes building and integrating external dependencies easy and fun (relative to traditional systems-software build tools, like GNUmake15). -
On the other, professional projects can quickly accumulate a staggering amount of dependencies. Many of which are transitive (dependency of a dependency).
While long compile times are a nuisance, the true downside of large dependency graphs is maintenance. Just because you've updated to the latest version of a direct dependency doesn't mean its authors have done the same. It's possible to, directly or indirectly, depend on crate versions with known security issues.
This is where cargo-audit16, another cargo plugin, comes in.
It scans your entire dependency graph for known-vulnerable crate versions.
Using public data cataloged in the Rust Security Advisory Database17, maintained by the Rust Secure Code Working Group18.
We can audit the full dependency graph of Chapter 2's rcli tool.
Note we run the command from the workspace root, not the rcli folder:
cd code_snippets/chp2/crypto_tool/
cargo audit
At the time of this writing, the scan loaded 399 security advisories (the signature data) and checked 29 dependencies (the full dependency graph):
   Fetching advisory database from `https://github.com/RustSec/advisory-db.git`
      Loaded 399 security advisories (from /home/tb/.cargo/advisory-db)
    Updating crates.io index
    Scanning Cargo.lock for vulnerabilities (29 crate dependencies)
Remember the static/dynamic known/unknown quadrant from Chapter 2?
cargo-audit won't discover brand new bugs specific to your project, but it's an important health check for your dependencies.
Since our rcli project was fine, you might be curious what cargo-audit's warning or error output looks like.
Here's a sample warning:
Crate:         difference
Version:       2.0.0
Warning:       unmaintained
Title:         difference is unmaintained
Date:          2020-12-20
ID:            RUSTSEC-2020-0095
URL:           https://rustsec.org/advisories/RUSTSEC-2020-0095
Dependency tree:
difference 2.0.0
└── predicates 1.0.8
cargo-binutils
cargo-binutils19 is a wrapper for GNU Binutils[^GNUBinutils], a collection of command line tools for inspecting Linux binaries.
We won't enumerate every tool in the Binutils suite here.
To give you a feel - we can use the size subcommand to get the exact count bytes in every section of the output binary for Chapter 2's rcli tool:
cd code_snippets/chp2/crypto_tool/rcli
cargo size --release -- -A
One specific line prints the size of the .text section, where ELF20 binaries store executable code:
section                   size     addr
.text                   598995   0x9080
The exact number reported will vary depending on your compiler version and host architecture.
In our case, rcli contains 599 kB of executable code when built with optimizations (--release).
Takeaway
1st party tooling lets us generate up-to-date documentation that doubles as a test suite, lint our code for the latest best-practice patterns, ensure consistent formatting across large development teams, and facilitate reproducible builds.
3rd party tools perform a range of auxiliary tasks.
The list above is just a sample of what's out in the ecosystem, with more tools and cargo plugins becoming available every year.
If you build production software in Rust, you're making investment in the language, toolchain, and ecosystem.
Ecosystem dependency versions are easy enough to mange, SemVer12 numbers are configurable via Cargo.toml.
But what about the language itself?
We'll conclude this chapter by taking a brief look at the release cycle of the Rust toolchain. Don't worry - changes are always backwards compatible, new versions won't break your code. But understanding how Rust's versioning works is useful. Whether you want to keep up with the latest-and-greatest or just keep the production ship sailing smoothly.
-
What is rustdoc?. The Rustdoc Book (Accessed 2022). ↩
-
Basic Syntax, The Markdown elements outlined in the original design document.. Matt Cone (Accessed 2022). ↩
-
Clippy Lints. The Rust Team (Accessed 2022). ↩
-
MachineApplicable. The Rust Team (Accessed 2022). ↩ -
Trojan Source: Invisible Vulnerabilities. Nicholas Boucher, Ross Anderson (2021). ↩
-
Security advisory for rustc (CVE-2021-42574). The Rust Team (Accessed 2022). ↩
-
Configuring Rustfmt. The Rust Team (Accessed 2022). ↩
-
Cargo.tomlvsCargo.lock. The Cargo Book (Accessed 2022). ↩ -
Specifying Dependencies. The Cargo Book (Accessed 2022). ↩
-
Semantic Versioning 2.0.0. Tom Preston-Werner (Accessed 2022). ↩ ↩2
-
cargo-modules. Vincent Esche (Accessed 2022). ↩
-
cargo-audit. Alex Gaynor, Tony Arcieri, Sergey Davidoff (Accessed 2022). ↩
-
The Rust Security Advisory Database. Rust Secure Code Working Group (Accessed 2022). ↩
-
Secure Code Working Group. Rust Secure Code Working Group (Accessed 2022). ↩
-
cargo-binutils. The Rust Embedded Working Group (Accessed 2022). ↩
-
Tool Interface Standard (TIS) Executable and Linking Format (ELF) Specification. TIS Committee (1995). ↩